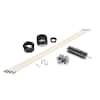
Gardus LintEater Rotary Dryer Vent Cleaning System (RLE202)
Drill-powered brush on flexible rods that reaches about 12 ft. The standard DIY kit.
Home Depot prices as of 2026-10-15Failure to clean is the leading factor in home clothes-dryer fires, according to the U.S. Fire Administration. If loads take longer to dry, the vent is the first thing to check.
DIY range is the Home Depot price of the parts below as of Oct 15, 2026. We didn't find a reliable published pro rate, so none is shown.

Tick items off as you shop. Ratings and review counts were checked on 2026-10-15. Home Depot prices are as of 2026-10-15. Amazon shows its price at checkout.
Drill-powered brush on flexible rods that reaches about 12 ft. The standard DIY kit.
Home Depot prices as of 2026-10-15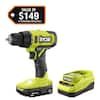
Spins the brush rods. Any drill you already own works.
Home Depot prices as of 2026-10-15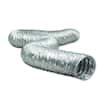
Swap out crushed, foil or plastic transition duct for semi-rigid aluminum.
Home Depot prices as of 2026-10-15Unplug the dryer. For gas, close the gas valve and be careful not to kink or loosen the gas line.
Pull the dryer forward and loosen the clamp at the back to free the duct.
Vacuum lint from the dryer's exhaust port and the lint-trap housing.
Feed the brush through the duct a few feet at a time, spinning it clockwise with the drill, then pull lint back out.
Remove lint and any nests from the exterior vent hood. The flap should move freely.
Replace damaged duct, reattach with clamps, push the dryer back without crushing the duct, and confirm air flows outside.
Our picks of the clearest tutorials. Credit and copyright belong to the creators.
Full DIY clean with a brush kit.
Visit channel ↗Short, clear demo from inside and outside.
Visit channel ↗At least once a year, and sooner if drying times are getting longer, the dryer feels very hot, or you smell burning.
Avoid it. The U.S. Fire Administration warns plastic and foil ducts can sag and trap lint. Use rigid or semi-rigid metal duct.
For very long runs, roof vents, or vents with many bends, or if the duct is hidden in walls you can't reach.
Seasonal maintenance, the tools worth buying, and a new guide each month.